Uploading Firmware
Creating a Cabinet Archive
The .cab archive format was chosen to match the format expected
by Windows Update.
This allows vendors to produce one deliverable that can be submitted to the LVFS
for signing and then to Microsoft Update, or the other way around.
Signatures from one process will not overwrite signatures from another.
It is recommended you name the archive with the vendor, device and version
number, e.g. hughski-colorhug-als-1.2.3.cab and is suggested that
the files inside the cab file have the
same basename, for example:

Files inside a typical archive
Using Linux
Cabinet archives can be created easily on Linux with the the gcab
command line program. For example:
$ gcab -c -v acme-product-name-v1_2_3.cab firmware.metainfo.xml firmware.bin
firmware.metainfo.xml
firmware.bin
Using Windows
When building archives on Windows you will need to use the makecab.exe
program. This works slightly different to gcab in that it needs
a manifest to be created of all the files that are included.
To create the manifest create a file called config.txt with the
following contents:
.OPTION EXPLICIT
.set Cabinet=on
.set Compress=on
.set MaxDiskSize=0
.set DiskDirectoryTemplate=.
.set DestinationDir=DriverPackage
firmware.metainfo.xml
firmware.bin
Then run makecab to create the 1.cab archive:
C:\> makecab /F config.txt
Cabinet Maker - Lossless Data Compression Tool

2,098,010 bytes in 2 files
Total files:              2
Bytes before:     2,098,010
Bytes after:      1,595,399
After/Before:            76.04% compression
Time:                     2.12 seconds ( 0 hr  0 min  2.12 sec)
Throughput:             968.26 Kb/second
Warning
If you forget the .OPTION EXPLICIT in the manifest then the size of
the archive is limited to 1.38Mb.
If you try including a firmware with a size greater than this you will see
Invalid folder index when trying to use fwupdmgr as the archive is not valid.
The maximum size of the archive that can be created with makecab is 2GB.
Signing The Archive
The upload process repacks the uploaded archive into a new cabinet file and signs the firmware image using a detached GPG or PKCS#7 signature so client tools can be sure the firmware actually originated from the LVFS. Any existing Windows Update signatures are also copied into the new archive although are not used on Linux. The signed archive is prefixed with the hash of the uploaded file to avoid clashes with other uploaded files and to make the download location non-predictable.
Remotes
Normally firmware is uploaded to a private remote.
This firmware is available to only the user that uploaded it, and any QA users
in the vendor group. It is not visible to end-users, other vendors or to fwupd
running locally.
Firmware can be moved to a so-called embargo remote that means that is included
in the private metadata catalog that is available for any users in the same
vendor group.
It is not available to any other vendors (even vendors acting as ODM or OEM) and
is also not available to the public.
Once the firmware is moved to testing it is available to the general public,
typically a few thousand users who have opted-in to testing pre-release firmware.
Then the firmware can be moved to stable which makes it available to tens of
millions of public users.
Affiliated Vendors
The affiliates feature on the LVFS may be interesting to larger OEMs, as it allows users working for other ODMs to upload firmware on the OEMs behalf.
First, some nomenclature:
OEM: Original Equipment Manufacturer, the user-known company name on the outside of the device, e.g. Sony, Panasonic, etc.
ODM: Original Device Manufacturer, typically making parts for one or more OEMs, e.g. Foxconn, Compal, etc.
There are some OEMs where the ODM is the entity responsible for uploading the firmware to the LVFS. The per-device QA is typically done by the OEM, rather than the ODM, although it can be both. Allowing the ODM to log in as the OEM is not good design from a security, privacy or audit point of view.
The LVFS administrator can mark other vendors as affiliates of other vendors. This gives the ODM permission to upload firmware that is owned by the OEM to the LVFS, and that appears in the OEM embargo metadata. The OEM QA team is also able to edit the update description, move the firmware to testing and stable (or delete it entirely) as required. The ODM vendor account also doesn’t have to appear in the search results or the vendor list, making it hidden to all users except the OEM.
This also means if an ODM like Foxconn builds firmware for two different OEMs, they also have to specify which vendor should own the firmware at upload time. This is achieved with a simple selection widget on the upload page, but is only shown if affiliations have been set up.
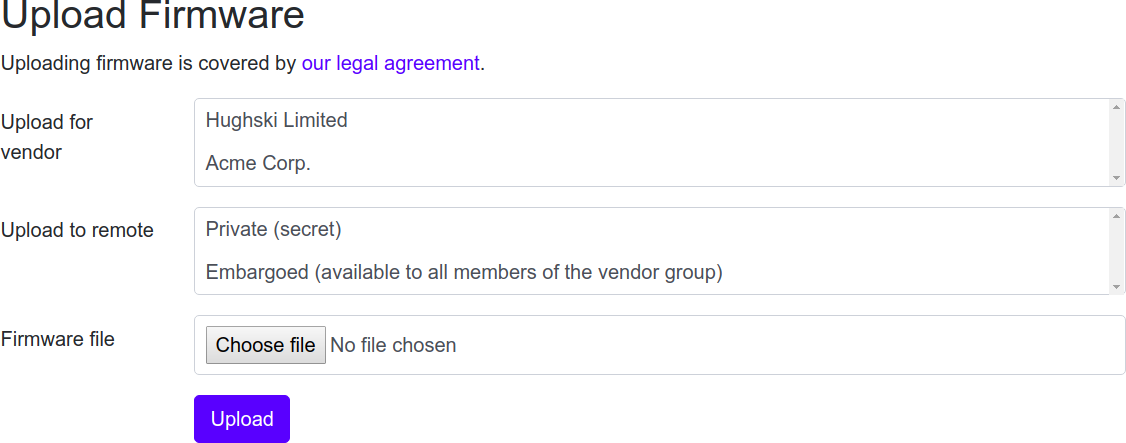
Upload page for ODM.
The ODM is able to manage their user accounts directly, either using local accounts with passwords, or ODM-specific OAuth which is the preferred choice as it means there is only one place to manage credentials.
Moving Firmware From ODM to OEM
In some instances it is better to upload firmware by the ODM vendor to the ODM group, rather than the affiliated OEM. This would let anyone in the ODM QA group modify the update, for instance changing the update description or performing an end-to-end test.
Once the firmware has been tested, it can be moved to the OEM account, although it can only be moved back by the OEM as the ownership has been transferred.
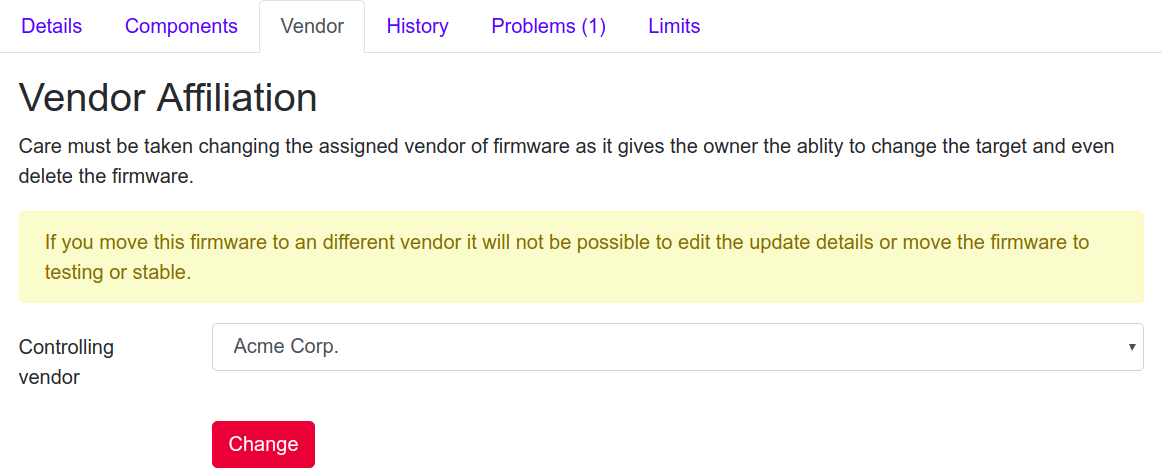
Moving a firmware to a different vendor.
Automatic Uploads
You can automate the upload of firmware from a build pipeline by creating a user token. This can then be used to upload firmware for that user using a script, e.g.
curl -X POST -F file=@/tmp/foo.cab https://fwupd.org/lvfs/upload/token \
     --user "username@domain.com:USERTOKENHERE"
All firmware visible for the user can also be queried in the same way:
curl https://fwupd.org/lvfs/firmware/auth --user "username@domain.com:USERTOKENHERE"
The mapping from vendor name to LVFS vendor ID can be found using:
curl https://fwupd.org/lvfs/vendors/auth --user "username@domain.com:USERTOKENHERE"
Warning
Do not use your login password! Generate a token when logged in to the LVFS using the User Profile settings.