fwupd is a system daemon that allows an OS
to update the firmware of a wide array of peripherals. ChromeOS relies on it to
perform the firmware updates of compatible and updatable devices.
Moblab contains a set
of fwupd test suites to test the basic firmware-related operations that fwupd
can perform on a device. The purpose of these tests is, primarily, to validate
the correct firmware updatability of new peripherals so that they comply with
the WWCB Certification
and to check the consistency and correctness of these operations across
different ChromeOS versions and firmware releases.
In order to have access to ChromeOS test releases you’ll need a Partner Domain
account. To ask for an account, send a request to cros-pd-owners@google.com.
Note
Besides the Partner Domain account, you should also get access to a
CPCon account, a Service
account and a GCS bucket tied to the CPCon account.
How to ask for access to ChromeOS images for specific boards
Depending on the Chromebooks and Chromeboxes that you use for the tests, you’ll
need to have explicit access to the ChromeOS test images for each specific model
or board type so you can download them from the ChromeOS Partners Portal.
To request access, create an issue in the Partner Issue Tracker
using Component “ChromeOS Public Tracker > Services > Infra > Moblab”
(1038089) and template “Build Permission Access Request” and fill in the
template details.
Moblab is based on a Google Chromebox (Wukong or Wyvern). The distributor
of Moblab is CREATE TOGETHER TECHNOLOGY Co. Ltd. To inquire a quotation, reach
out to:
Network equipment as described in section “II - Requirements” of the Moblab
Instruction Manual,
at least two Ethernet cables and a USB to Ethernet dongle. Follow the
instructions in section “II.2 - Now that I have all the required hardware, how
do I connect them?” in the Moblab Instruction Manual to setup the test lab
A USB flash drive larger than 8GB
An hdmi or displayport monitor, a keyboard and a mouse
If the DUT is a Chromebox: an additional monitor, keyboard and mouse
In order to use a Chromebook or Chromebox for Moblab tests it needs to be
running a ChromeOS test release. Before continuing, make sure you have a partner
domain account with access to the ChromeOS Partners Portal
and to the ChromeOS images for the specific Chromebook/Chromebox board types you
want to test.
First, start by flashing a ChromeOS test image into a USB flash drive:
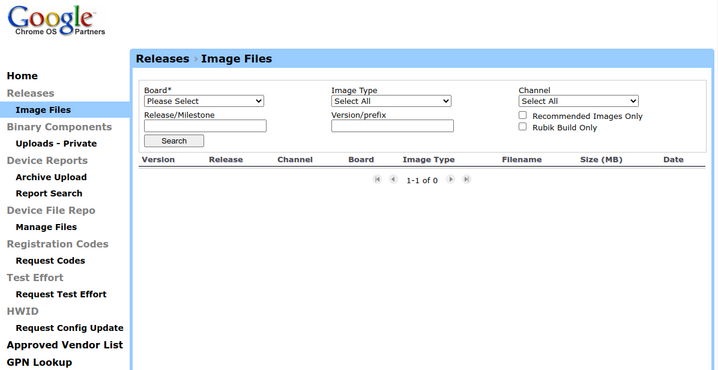
Go to the ChromeOS Partners Portal <https://www.google.com/chromeos/partner/fe/#release>
and log in with your partner domain account and click the “Image Files” tab.
Select the board of the Chromebook or Chromebox to test and
TEST_IMAGE_ARCHIVE in the “Image Type” drop-down menu, and click “Search” to
list all the ChromeOS test images for that board. You can refine the search
by entering a specific “Release/Milestone” and/or a specific “Version/prefix”.
Download a recent test image (dev or stable channels recommended) and
decompress it with:
$ tar -Jxvf <release_file.tar.xz>
Click the extension button in Chrome, then select Chrome
Recovery Utility
Select the gear icon in the window. Next, click Use local
image.
Select the chromium_test_image.bin file extracted in step 3
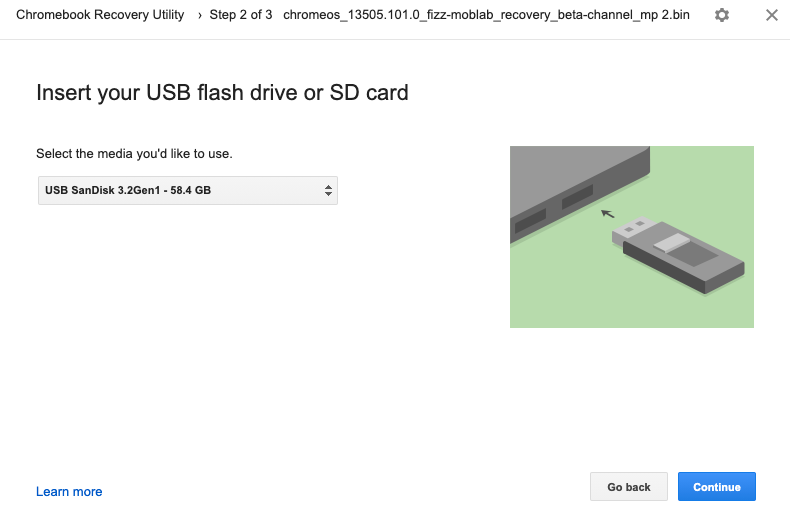
Plug in the USB flash drive and select it as the media to use. Click
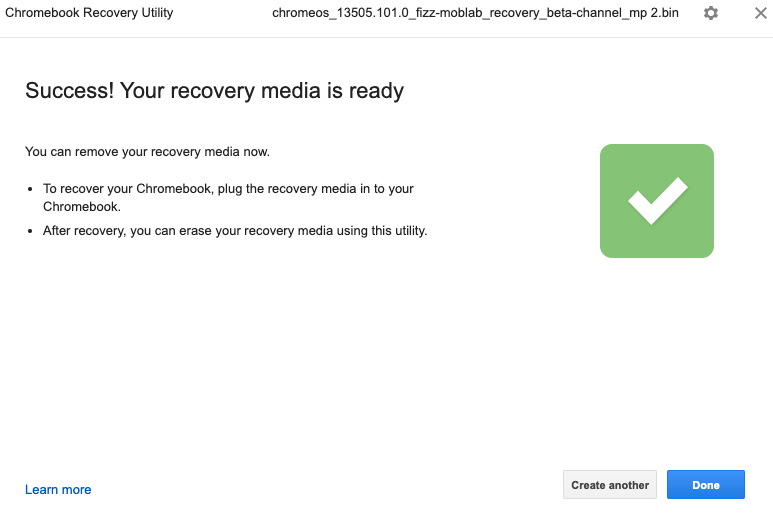
Continue and then Create now. Wait until the image is completely
written to the USB drive.
Once complete, Select Done then unplug the USB flash drive
Next, to install the image in the Chromebook or Chromebox, follow these steps:
Put the device into Developer Mode
with the following procedure:
For Chromebooks, Hold Esc+Refresh and press the
Power button. For Chromeboxes, engage the small Reset pinhole with
a paperclip, hit Power and continue engaging Reset for 2 seconds.
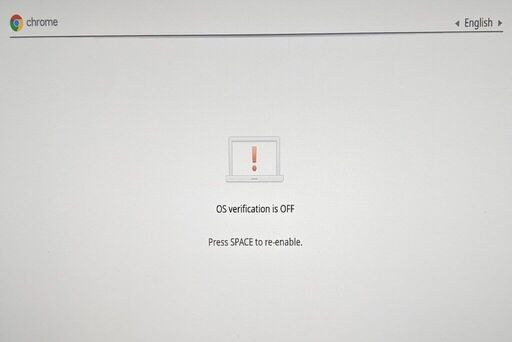
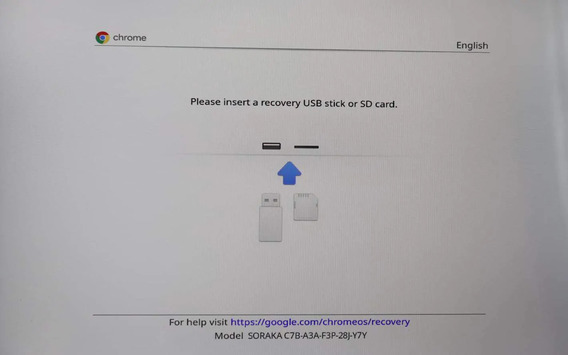
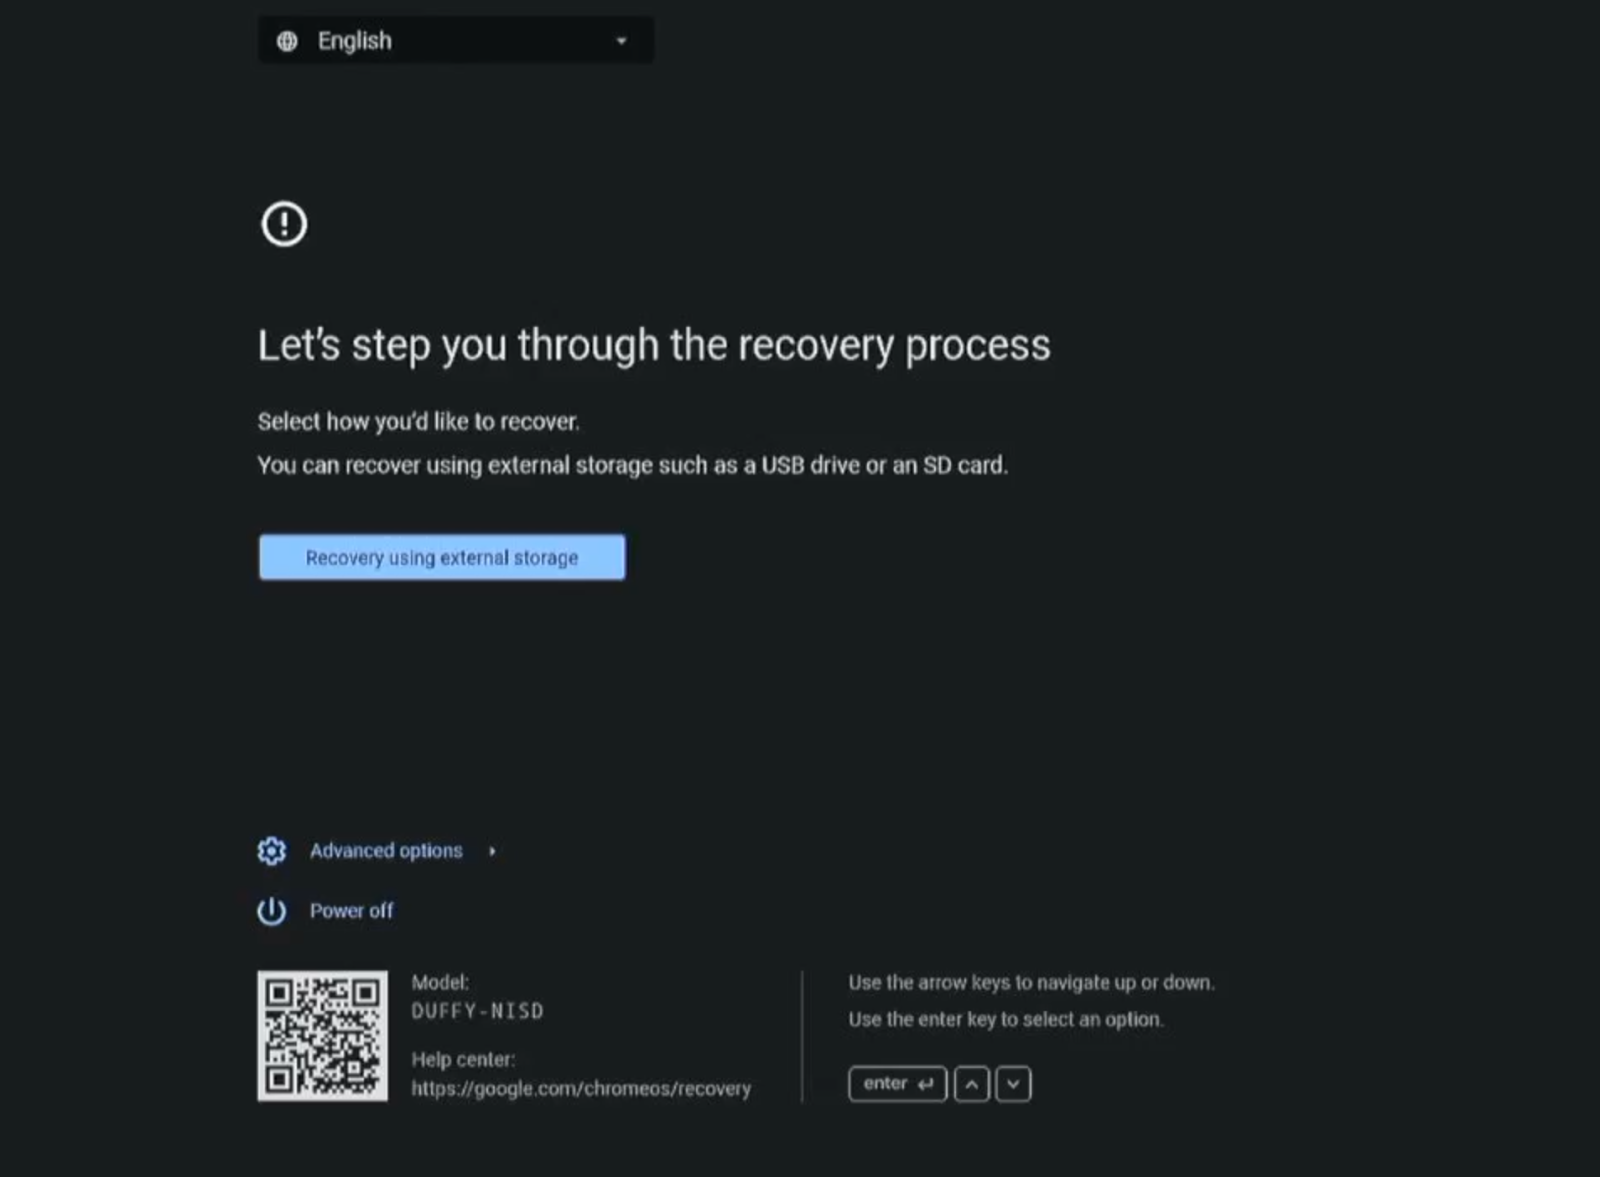
This will put the device into Recovery Mode and it should show a
screen similar to this:
Or this, depending on the model:
Note
On some Chromebooks the combination to hold is Esc+Fullscreen instead.
In the Recovery Mode screen, press Ctrl+D, followed by Enter to
enter Developer Mode
Note
For other devices without keyboards (such as tablets) follow
these instructions
to enter Recovery Mode and Developer Mode
Wait until the process is done and the Developer Mode warning screen appears
Once the device is in Developer Mode, it will show the warning screen above
every time it boots. It’ll start ChromeOS after 30 seconds or if you press
Ctrl+D. Start ChromeOS and wait for it to show the welcome screen
Go to virtual terminal 2 to access a command line prompt by pressing:
[ Ctrl ] [ Alt ] [ → ]
where the [ → ] key is the right-arrow key just above the number 3 on the
keyboard. If the keyboard doesn’t have this key, use the key in the F2
position. Then log in with user: root
Now reboot and wait for the Developer Mode warning screen to appear, plug in
the USB flash drive and press Ctrl+U to boot the ChromeOS test image
from the USB drive.
Wait for ChromeOS to start
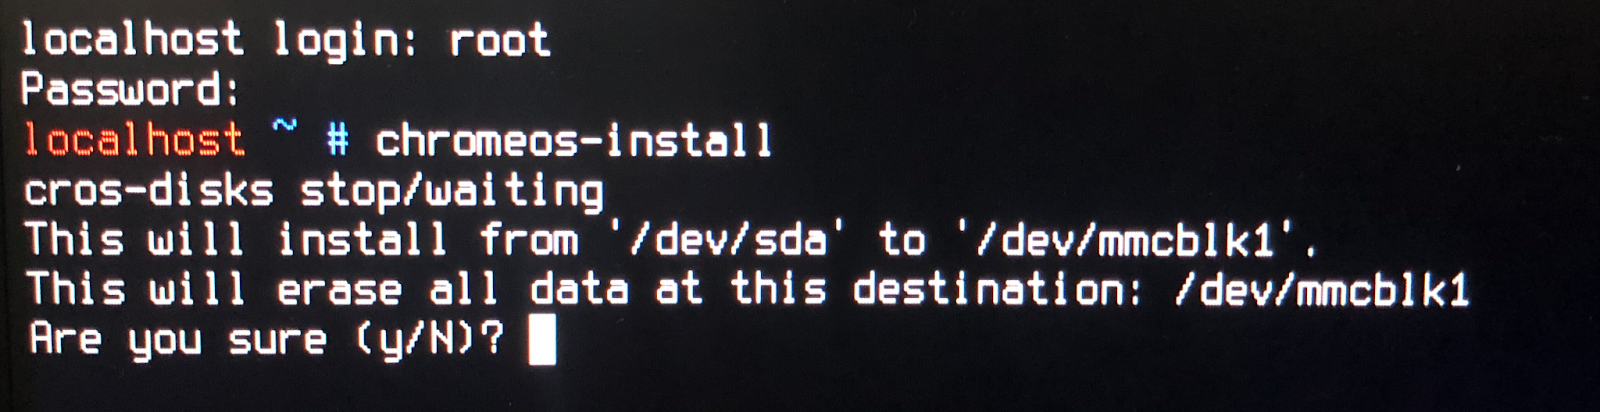
Once ChromeOS is running, go to virtual terminal 2 again and log in with
user: root and password: test0000. Then install the test image in the
hard disk with the following command:
$ /usr/sbin/chromeos-install
and follow the instructions
Once installation has completed, reboot the device (shutdown-hnow) and
remove the USB flash drive
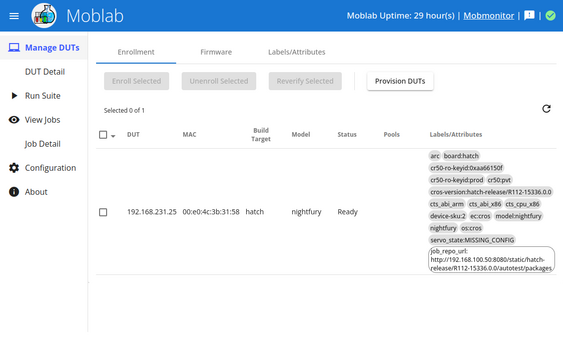
Follow the instructions in the Moblab Introduction & User Manual
to configure the Moblab, connect the DUT (Chromebook or Chromebox) to it and
enroll it. The end result must be something like this, where the “Manage DUTs”
tab shows an enrolled DUT with a “Ready” Status:
The peripherals to test must be in working order. If they are meant to be
updated wirelessly, they must have sufficient battery level to ensure the
firmware update process can be completed successfully. They must also be
supported by fwupd and they must have at least a firmware release included in
the ChromeOS-specific fwupd remotes, which are defined in the latest .ebuild
file in https://chromium.googlesource.com/chromiumos/overlays/chromiumos-overlay/+/refs/heads/main/sys-firmware/fwupd-peripherals/.
The fwupd version might be different from one ChromeOS version to another, so a
device that is supported by fwupd in a newer ChromeOS version might not be
supported in an older one.
Each Moblab test run will start by provisioning the DUT, that is, updating its
ChromeOS version to the one specified by the tester and checking that it can run
the tests properly. This has some side effects:
The DUT will constantly check for an Ethernet link and will reboot
automatically if it doesn’t detect one after a few seconds.
All Bluetooth device pairings will be wiped out
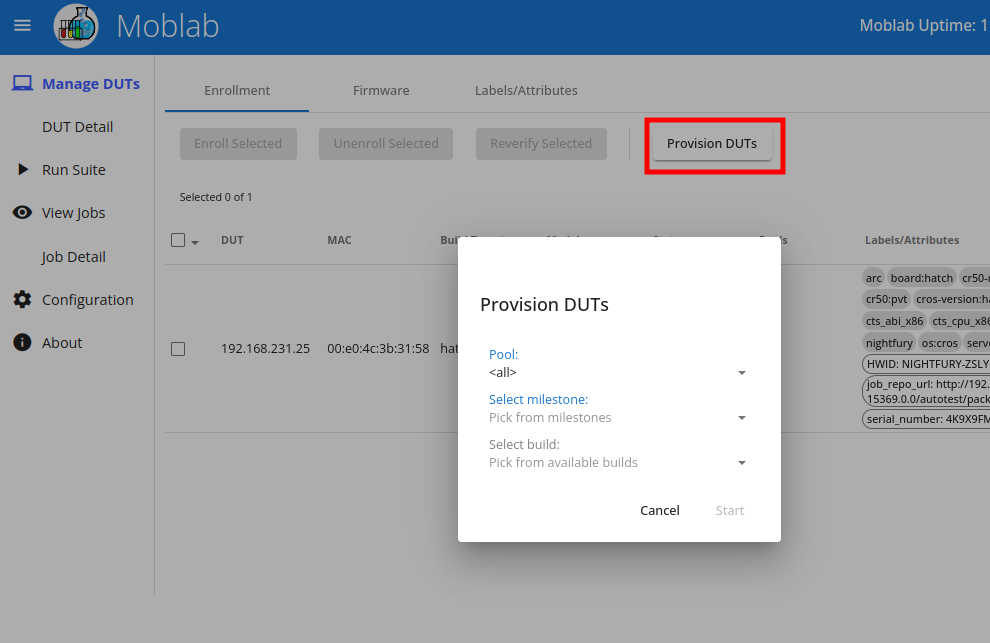
A DUT can be also provisioned on demand by selecting the DUT in the “Manage
DUTs” tab and clicking on the “Provision DUTs” button, then selecting the
milestone and build to use:
The FWUPD tests are available only on ChromeOS R113-15382.0.0 and later.
Tests of firmware updates/downgrades/installs over Bluetooth links are not
properly supported at the moment
The procedure to run the tests is the same for all the test cases except for the
parameters they take. To start a test, follow these steps:
Make sure the DUT that will run the test is running, connected to the Moblab
network and that it shows up in the “Manage DUTs” tab in Moblab
Enroll the DUT for tests by selecting it in the “Manage DUTs” tab and then
clicking “Enroll Selected”
Make a note of the DUT IP address, as it’ll need to be specified later as one
of the test parameters
Connect the peripheral to the DUT and power it on
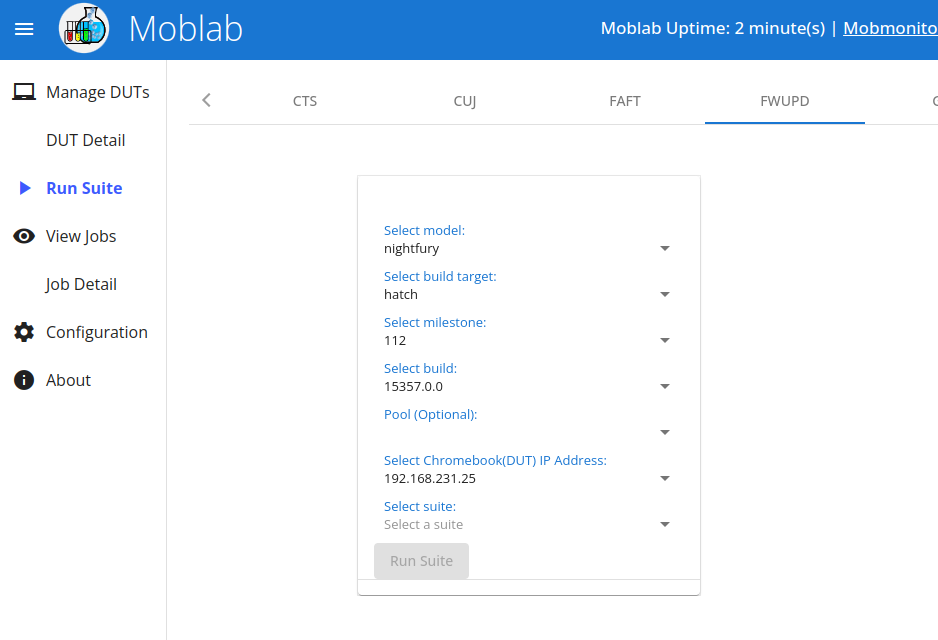
Go to the “Run Suite” tab and select “FWUPD” in the top menu
Select the model and build target of the selected DUT, and then the ChromeOS
milestone and build to run the test on. Important: only ChromeOS
R113-15382.0.0 and later. The tests won’t be started for any version older
than that.
Select the IP address of the DUT that will run the test
The rest of the steps depends on the test case to run:
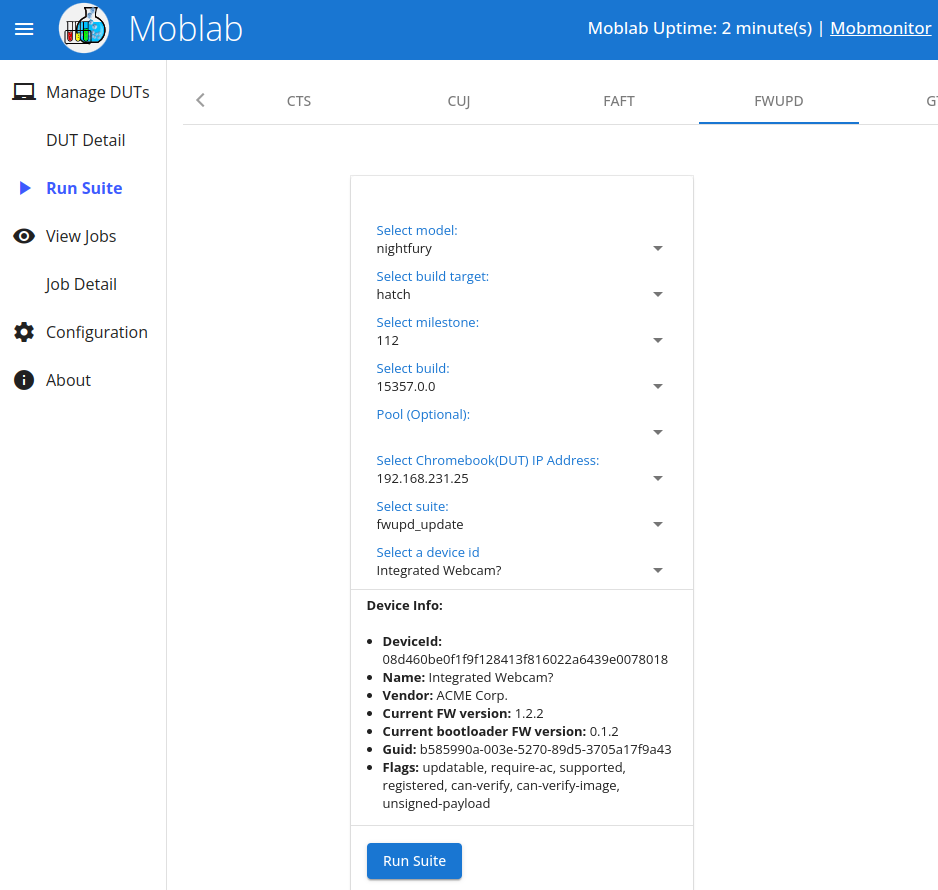
This test allows the user to flash any available firmware release into a device,
regardless of the current version running on it. To run it:
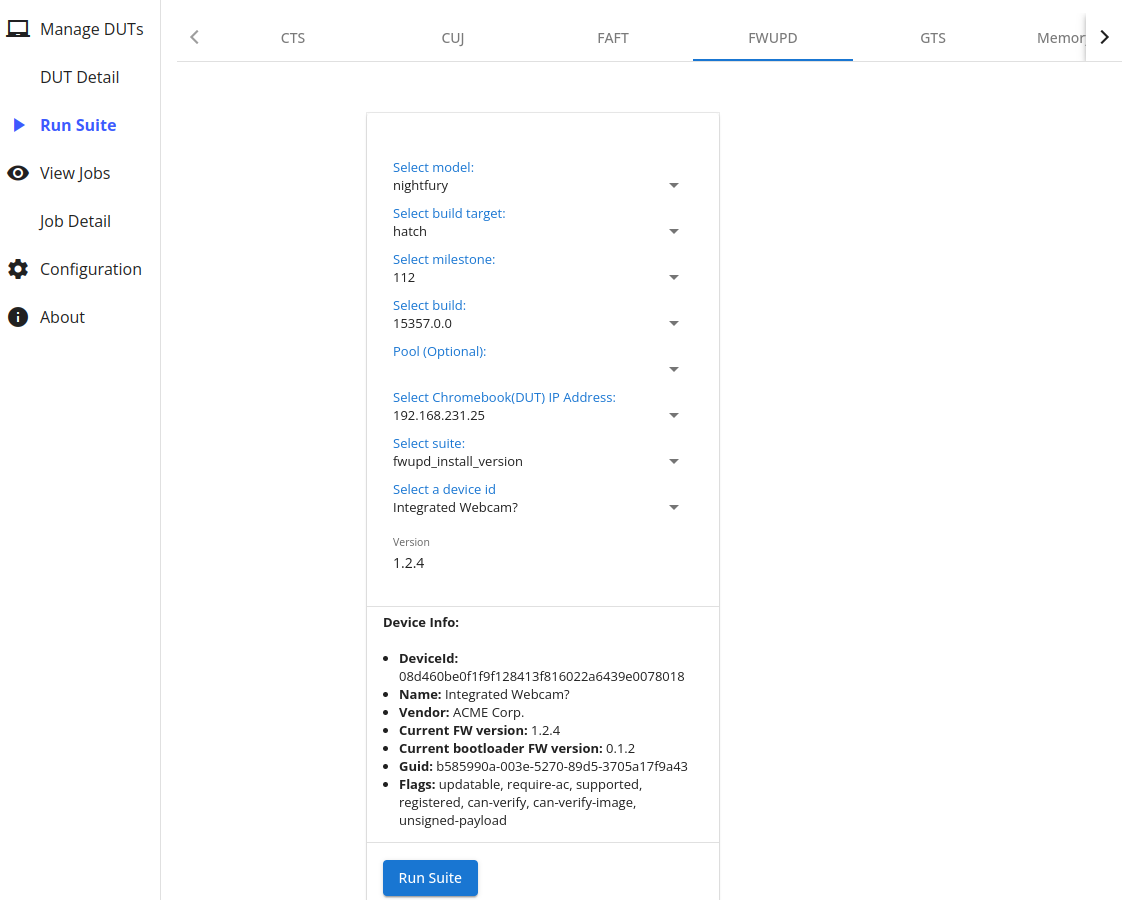
Select the fwupd_install_version suite
Select the device you want to test
Input the release version you want to install. Note that the version must be
specified in the format defined by the hardware vendor (as a number pair,
triplet, hexadecimal number, etc.). The Device info at the bottom shows
the Current FW version with the expected format.
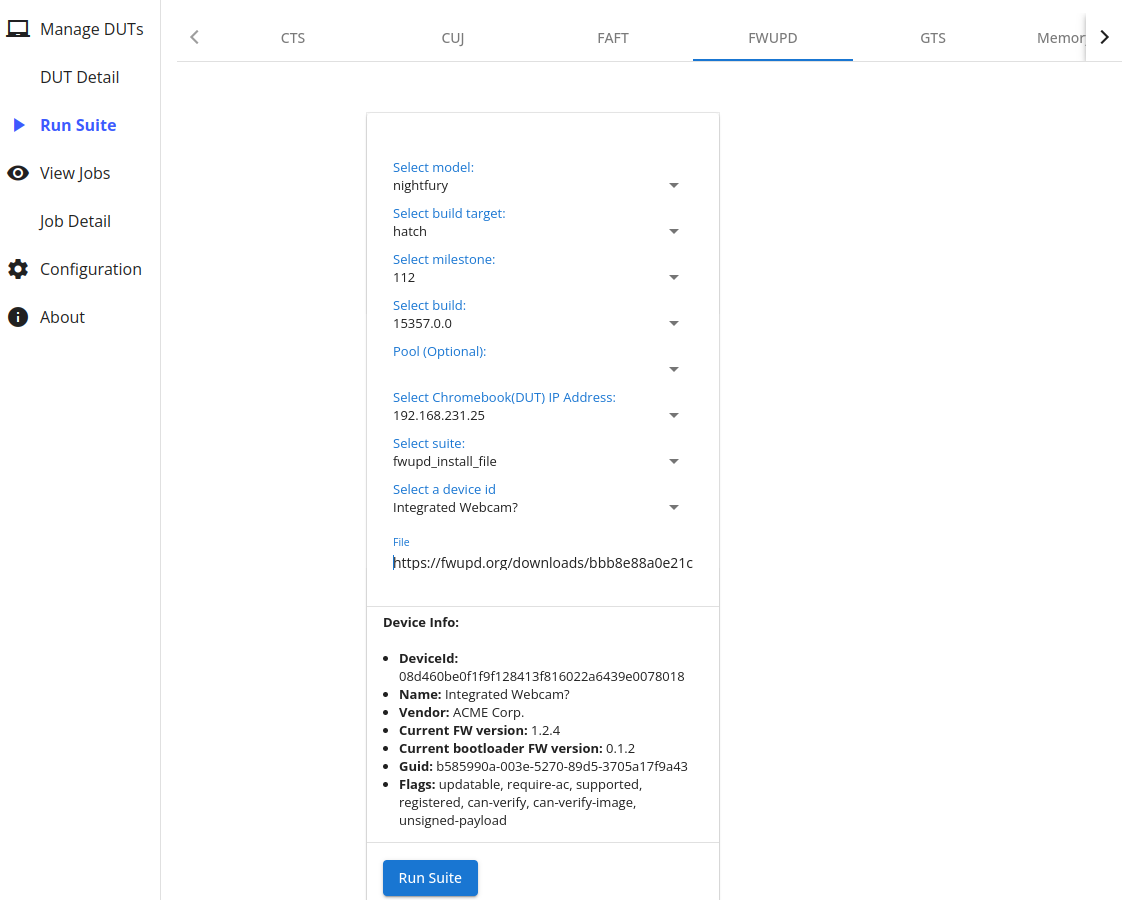
This test allows the user to flash a specific firmware file into a device. The
file can be provided either as a URL if it’s in a remote server, or through an
external drive connected to the DUT.
If the file is provided in an external drive, a USB flash drive is
recommended. Format it as FAT32 and set FWUPDTESTS as its label. Then copy the
firmware file to it and plug it to the DUT.
If the file is provided as a URL, it must be accessible for the DUT to
download.
To run the test:
Select the fwupd_install_file suite
Select the device you want to test
Enter the complete URL of the firmware file if it’s a remote file or the file
name if it’s a file provided through a USB flash drive
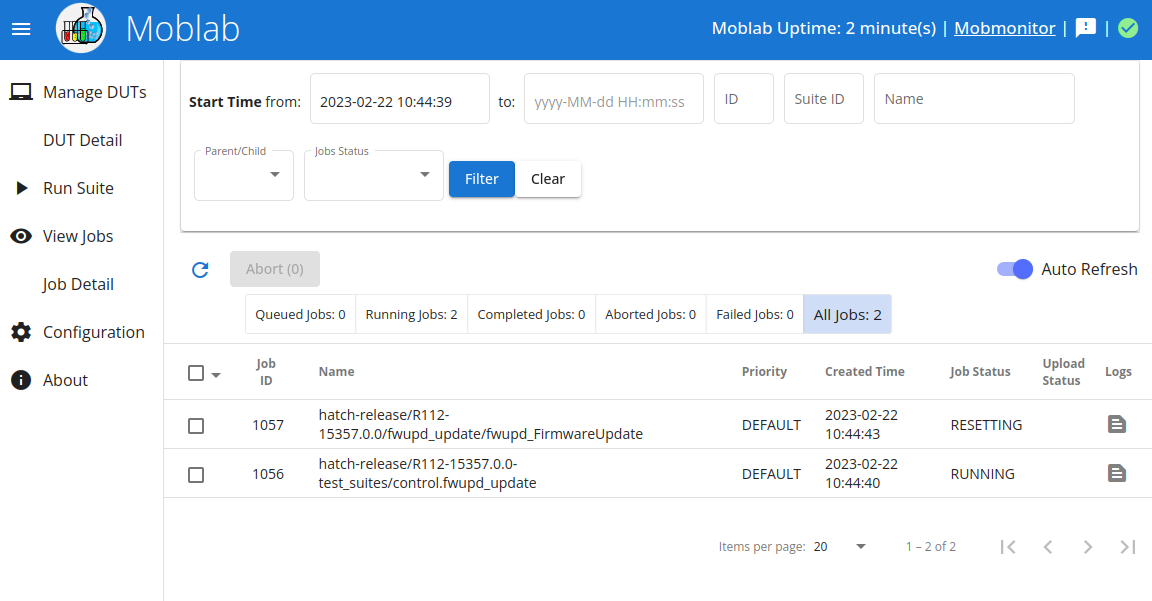
Once a test has started, it’ll show up in the “View Jobs” tab. You can enable
the “Auto Refresh” toggle switch to keep the job list updated as the job status
progress:
When the test finishes, its status will change to “COMPLETE”, the logs will be
stored locally and eventually uploaded to a Google Storage bucket. A cloud icon
in the “Logs” column means that the logs have been uploaded to Google Storage
and are no longer stored locally.
Note that for each test run there’ll be two entries in the jobs table: one
representing the test suite (control.fwupd_update in the image above) and
another representing the test proper (fwupd_FirmwareUpdate in the image).
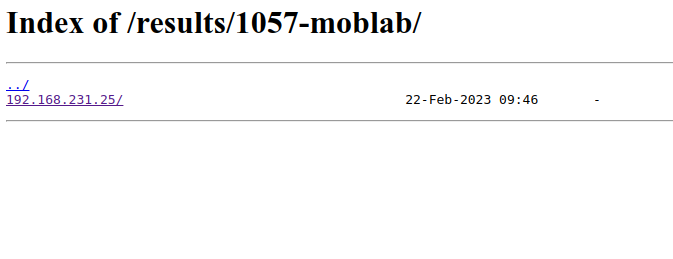
Once the job has finished you can check the results. If the logs haven’t been
uploaded yet, you can check them directly by clicking on the “Logs” icon for the
test job (not the suite). From there, navigate to the “status.log” file:
The “status.log” file shows a summary of the test result:
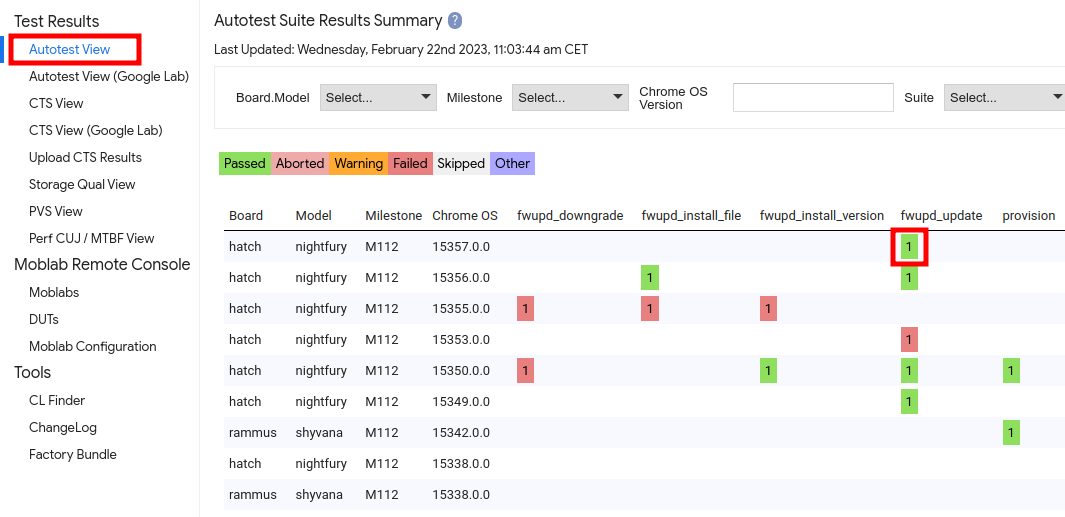
When the logs are uploaded to Google Cloud Storage, you can check them through
CPCon, accessing with your
partner domain account and clicking on the “Autotest View” option. From there
you can see all the test suites run on every Chromebook type and ChromeOS
milestone:
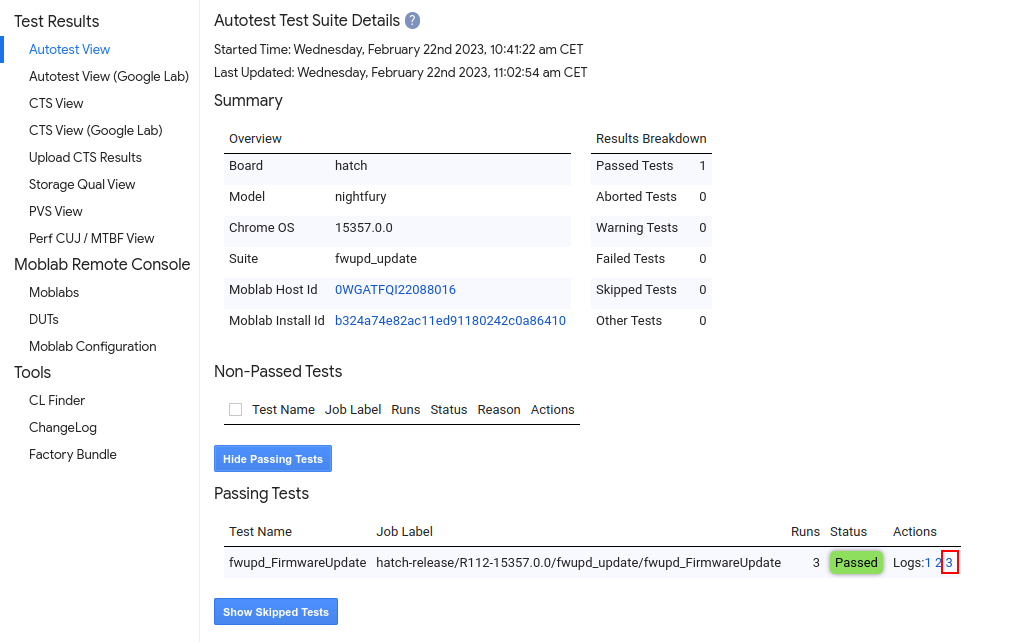
Clicking on any of the test suite results will lead you to a detailed summary of
that suite. All the different test runs for that particular Chromebook type and
ChromeOS version will show up listed either as a “Non-Passed test” or as a
“Passing test”. The most recent test run will be the last log listed:
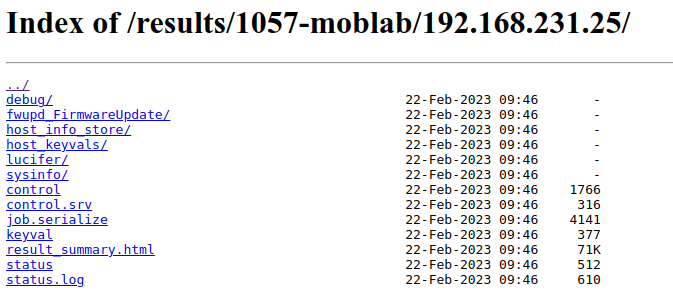
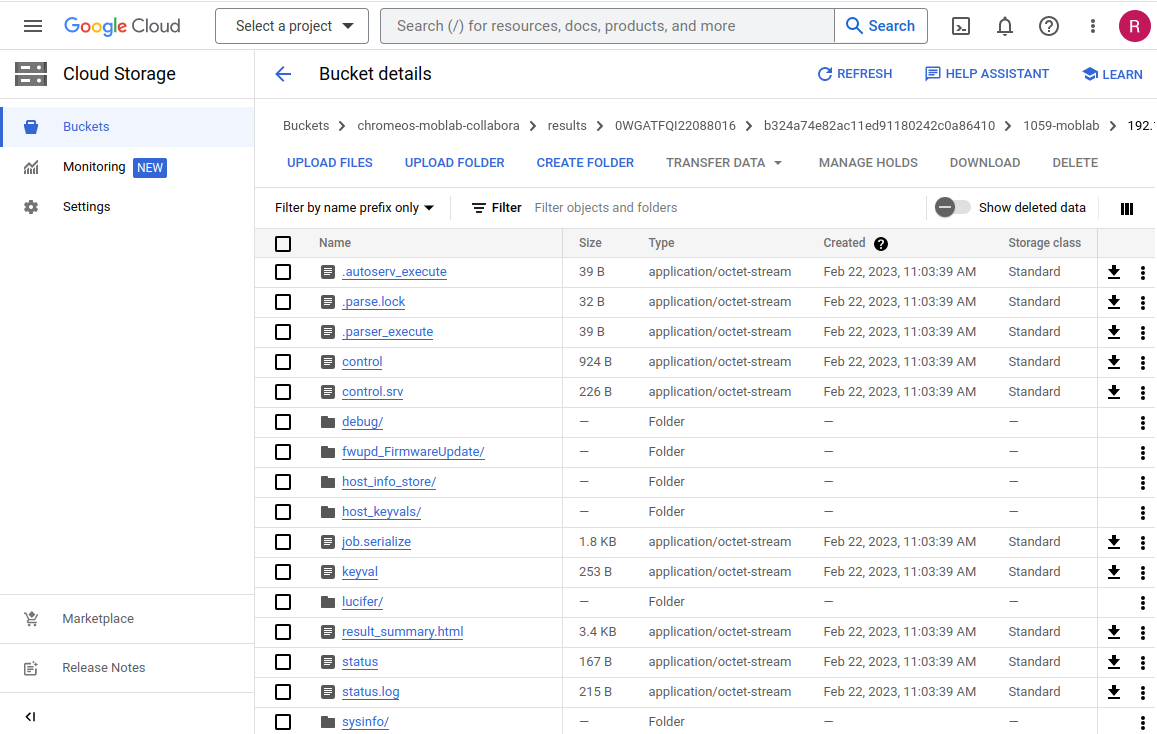
Clicking on any of the logs will direct you to the Google Storage bucket
directory containing the logs for that test run:
From there you can download the “status.log” file. The directory and file
structure is the same as in the locally stored logs.
If the “status.log” report doesn’t give enough information about a failed
test, you can also download the “debug/client.0.DEBUG” file, which contains
the full log including debug messages. Additionally, the “sysinfo/messages”
file contains the full system log that can also be useful to investigate a bug.
For instance, this “install file” test failed with this message in the status.log file:
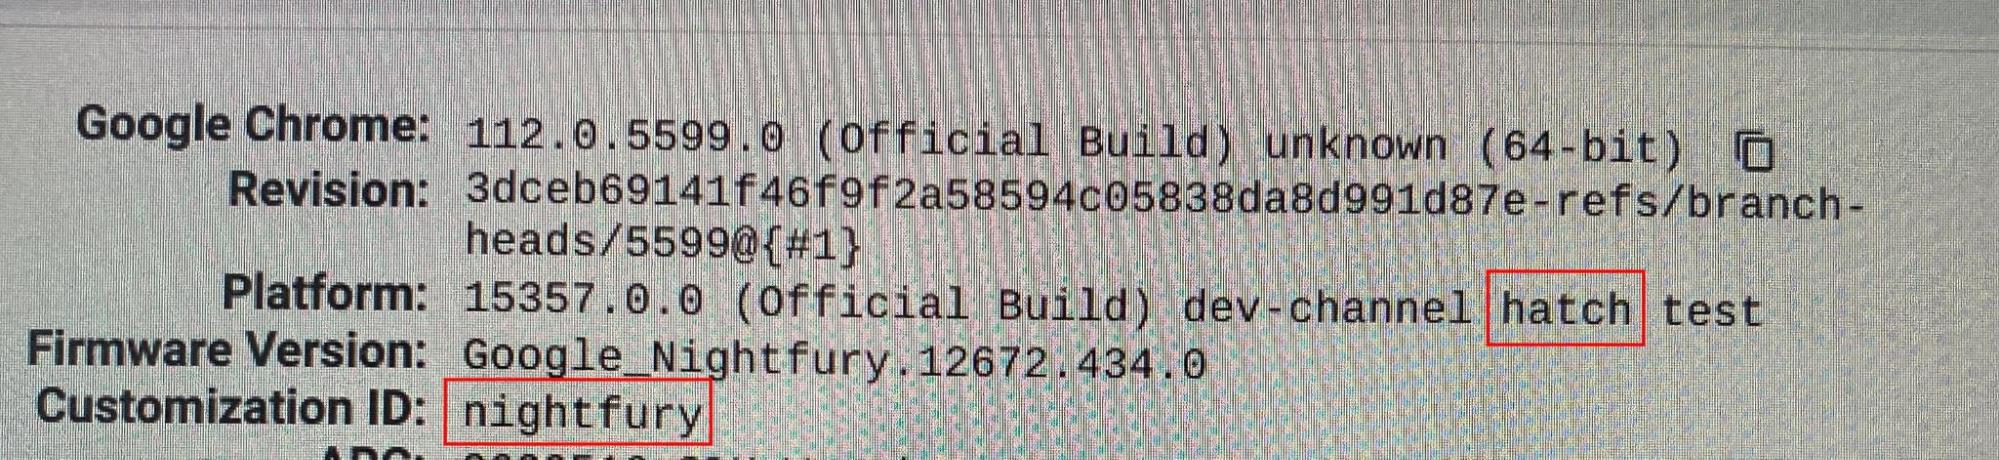
How to find the board type of a Chromebook or Chromebox?
In the Chromebook/Chromebox, open Chrome and enter chrome://version in the
URL bar. In the info screen that will appear, the board type and variant will
show up in the Platform and Customization ID fields, respectively:
In some scenarios it could be useful or needed to run certain console commands
in the DUT or to retrieve data from it that can only be accessed through a
terminal interface. If the DUT is running a test ChromeOS release, it’ll have an
SSH daemon running so you can connect to it remotely.
Requirements:
A Linux PC with an SSH client installed. If running Ubuntu, it can be
installed with the following command: sudo apt install ssh
The Linux host must be able to ping the DUT. The easiest way to achieve this
is to connect the DUT and the Linux PC to the same local network. If the DUT
is connected to a Moblab through a wired connection you can also connect to
the Linux PC using a wireless connection
Assuming the host you’re connecting from is running Linux, in order to connect
to the DUT you’ll need to download the ChromeOS test keys and configure your ssh
client properly following these steps:
Download the SSH keys from this link
and copy them to ~/.ssh in the Linux host
Set the correct file permissions for the private key:
chmod0600~/.ssh/testing_rsa
Get the IP address of the DUT. If the DUT is connected to multiple networks,
we need the IP address of the NIC that’s connected to the Linux PC network.
To list the available connections and their IP addresses go to virtual
terminal 2 in the DUT ([Ctrl][Alt][→]) and type: ip-4-bra
localhost~# ip -br -4 aloUNKNOWN127.0.0.1/8wlan0UP192.168.1.137/24arc_ns0@if2UP100.115.92.129/30arc_ns1@if2UP100.115.92.133/30eth0UP192.168.231.25/24
In this example, if the DUT is connected to the Linux PC network through a
wireless link, then we can check that the PC can ping the DUT at
192.168.1.137.
Add the following to ~/.ssh/config:
Host dut
  HostName $IP_ADDRESS
  User root
  CheckHostIP no
  StrictHostKeyChecking no
  IdentityFile ~/.ssh/testing_rsa
  ControlMaster auto
  ControlPersist 3600
Where $IP_ADDRESS is the IP address of the DUT
How to check the list of peripherals detected by fwupd?
If, for debugging purposes, you need to check the current list of peripherals
that fwupd is detecting, you can do so by running this command in a DUT
terminal:
If the DUT was provisioned (updated) using Moblab, it will check for an Ethernet
link and it will reboot if it doesn’t find one. Make sure to keep the DUT
connected to the Moblab network using an Ethernet link.
When you are done testing with the Chromebook, reflash it with a recovery image
to prevent it from restarting continuously when not connected to a network
through the Ethernet port.
 button in Chrome, then select Chrome
Recovery Utility
button in Chrome, then select Chrome
Recovery Utility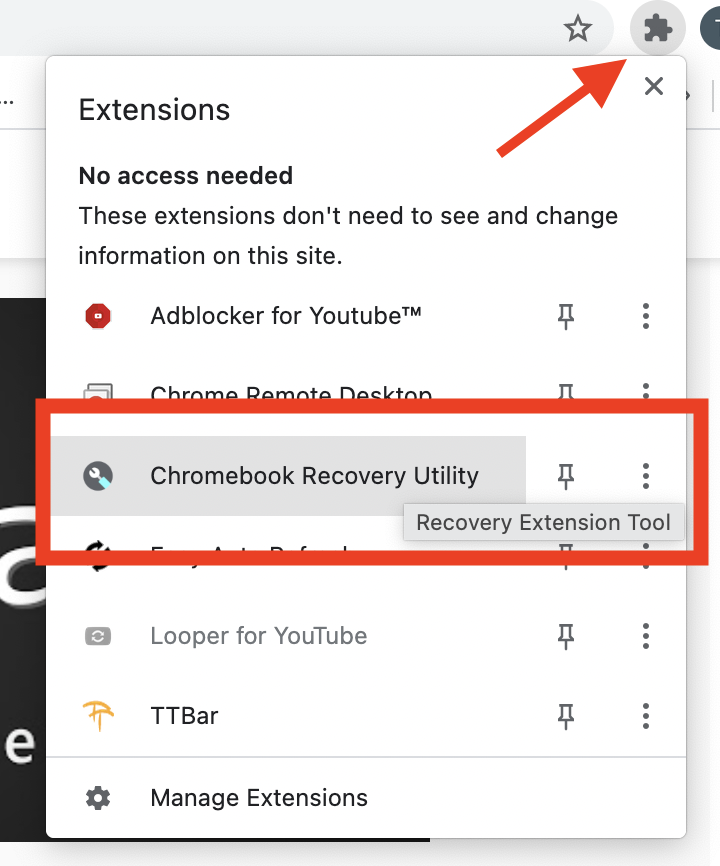
 in the window. Next, click Use local
image.
in the window. Next, click Use local
image.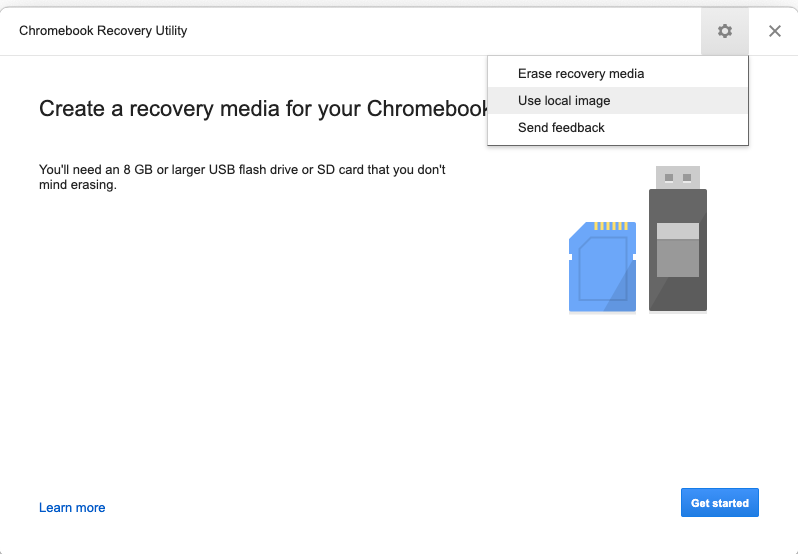
 and press the
 instead.